The 15-Second Trick For Plasterer
Wiki Article
The Basic Principles Of Plasterer
Table of ContentsThe 45-Second Trick For Plasterer8 Easy Facts About Plasterer DescribedThe Single Strategy To Use For PlastererPlasterer - Truths
Generally the professional has actually currently provided all the bags of Plaster plaster that will be required, in addition to any external supply of water if the home is not yet connected. The plastering staff needs to bring their own devices and also equipment as well as in some cases provide their own bead. The Tasks that the plasterer is generally anticipated to accomplish.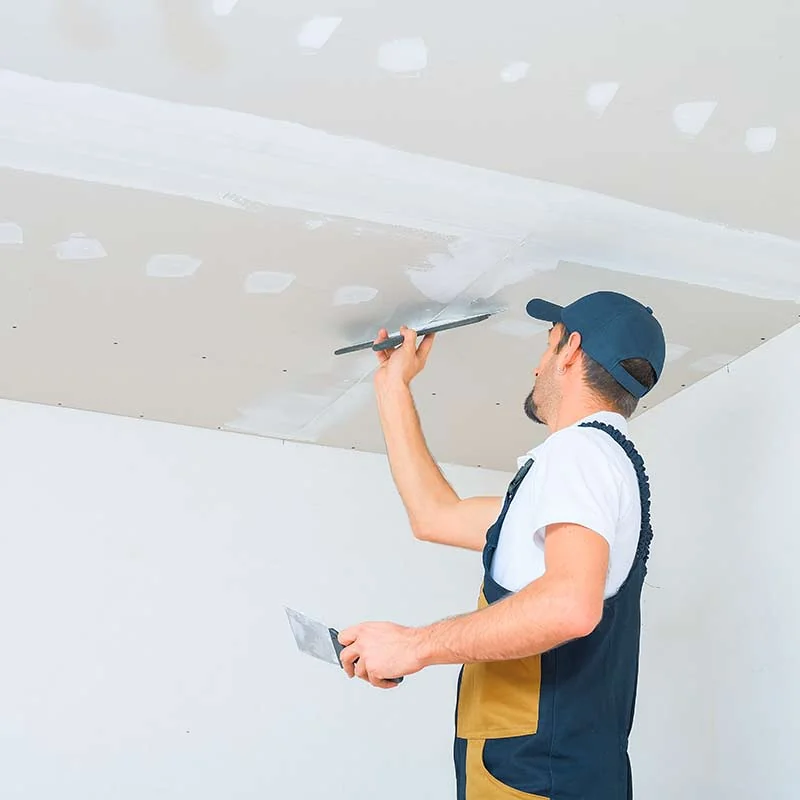

In position where greater than one edge meets; the grain's ends are reduced at an angle as well as the 2 or even more tips are positioned as close with each other as permitted; touching but not overlapping. The bead is completely covered with plaster in addition to the remainder of the wall surface as well as the plaster additionally helps to hold it strong.
This leaves a clean, straight looking corner. An alternative approach seen in older houses of forming a rounded or bullnosed corner uses a quirked wood staff grain. The staff grain, a 1-inch dowel with approx 1/3 slashed off the back, is established on the outside corner by the joiner on site, attached to wooden plugs established into the brick/block joints, or to the wood structure.
The 9-Second Trick For Plasterer
The peculiarity will certainly conceal the ultimate tiny split that will certainly create in between the team grain and also plaster. Normally a plasterer has one trowel for "laying on" (the process of placing mud onto the wall).A lay-on trowel often tends to be also level for this and also the vacuum triggered by the water can stick it to the wall surface, compeling him to tear it off and also thus he needs to revamp the area. Ultimately, one may have a new trowel "not yet broken-in" which he will certainly utilized for "grinding"; this is when the plaster is virtually set and also he is smoothing out any bumps or completing any tiny dips (pet cat faces) to make the wall surface resemble an uniform sheet of glossy white plaster.
some wield trowels as big as 20 inches long yet the norm appears to be a 16"5". From my experience the recommended brand is a Marshalltown stainless-steel. They have a brassy gloss to them, a rubber take care of and will not match or rust if accidentally left in water over night while others choose a regular swipe trowel which needs a lot more maintenance but lasts for quite a very long time and the matching can provide it a "bite" that aids when "ending up" (the last pass when the plaster is setting).
These tool pails are very first maintained near the mix table as well as after that as the plaster starts to establish are moved better to the wall that is being serviced. Time comes to be a huge variable right here as when the plaster starts to solidify (collection) it will do so relatively quickly as well as about his the plasterer pop over to this web-site has a little margin of mistake to obtain the wall surface smooth.
The Main Principles Of Plasterer
Any kind of particles in the plaster can become a major annoyance. Plasterers will generally split a space, (especially a large or high-ceilinged wall) into top as well as base. The one servicing top will certainly do from the ceiling's edge to about stubborn belly elevation and sweat off a milk crate for an 8-foot (2.The resident as well as the plasterer's employer will normally decide ahead of time what designs they will certainly utilize in your house. Commonly wall surfaces are smooth and also in some cases ceilings. Usually a property owner will decide to have the ceilings utilize a "texture" method as it is a lot easier, quicker, and hence cheaper than a smooth ceiling.
The board feet is gotten by the wall mounts or estimated by the head subcontractor by counting the wallboards that come in a sector standard of 8' to 12' long. Normally if the ceiling is to be smooth it is done first, prior to the walls.
The reason for this is that usually when a ceiling is being worked with plaster will certainly fall and also splash onto the walls. However an appearance mix doesn't require to be smoothed out when it begins to establish: hence a retardant such as "Lotion of tartar" or sugar can be used to lengthen the setup time, and also is quickly scraped off the walls.
The Main Principles Of Plasterer
another reason is that a bird is normally run along the top corner after doing a smooth ceiling, then it is much easier to keep this edge by doing the wall surface last. A distinctive ceiling usually doesn't need to be birded, just combined in with a very wet paint brush.The first thing the plasterer often tends to do is look at all the mesh-taped seams of the wall surfaces he is about to cover; in an extremely slim swatch - you could check here Plasterer. The wallboard draws moisture out of this strip so when the plasterer goes over it once more when doing the remainder of the wall it will not leave an indented joint that needs more reworking.
This saves a lot needed time as this process is a race against the chain reaction. From the mix table the plasterer scoops some "mud" onto the facility of his hawk with his trowel. Holding the hawk in his off-hand as well as his trowel in his key the plasterer then scoops a bulging roll of plaster onto his trowel.
Report this wiki page